.jpg&blockId=c274d3f5-f892-4f17-a6c1-7cdf71224491)

0. Introduction
본 튜토리얼은 freeCodeCamp.org의 YouTube 강의를 기반으로 정리하여 작성하였습니다.

0.1. Audio Plugins


1. Project Initialization
1.1. Configure JUCE Library
JUCE Repository에서 JUCE Framework를 Clone받습니다.
$ git clone https://github.com/juce-framework/JUCE.git
Shell
복사
JUCE Framework 안에 있는 Projucer는 JUCE Framework를 활용한 프로젝트를 만들어주는 역할을 합니다. JUCE/extras/Projucer/Builds/<YOUR_PLATFORM>에서 해당하는 플랫폼의 프로젝트를 열어줍니다. 필자는 MacOS를 사용중이기 때문에, MacOSX폴더의 xcodeproj 파일을 열겠습니다.
$ cd JUCE/extras/Projucer/Builds/MacOSX
$ xed .
Shell
복사
이후, 빌드 및 실행을 하면 아래와 같은 JUCE App이 보이게 됩니다.
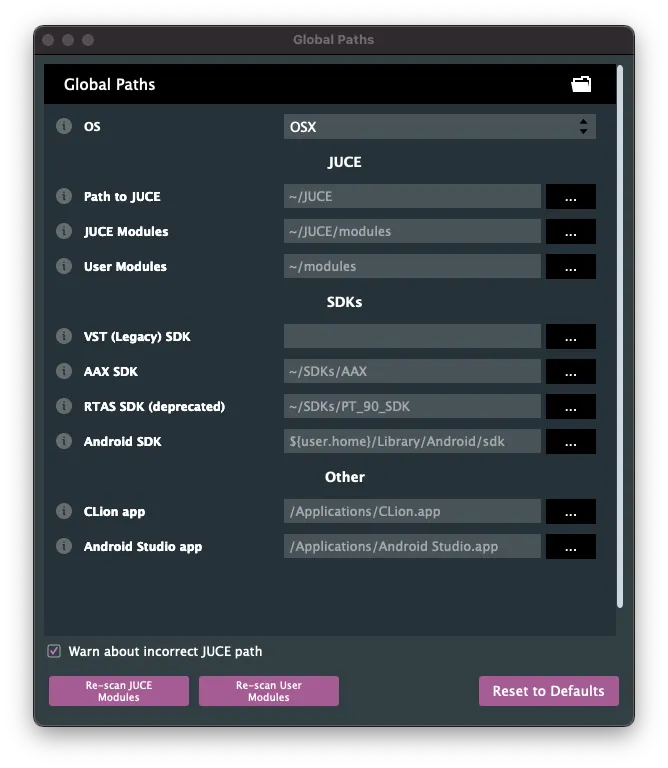
이 창이 보이면, 메뉴바에서 Projucer/Global Path를 알맞게 수정해줍니다. (git clone 후 실행했다면 자동으로 설정되어 있습니다.)
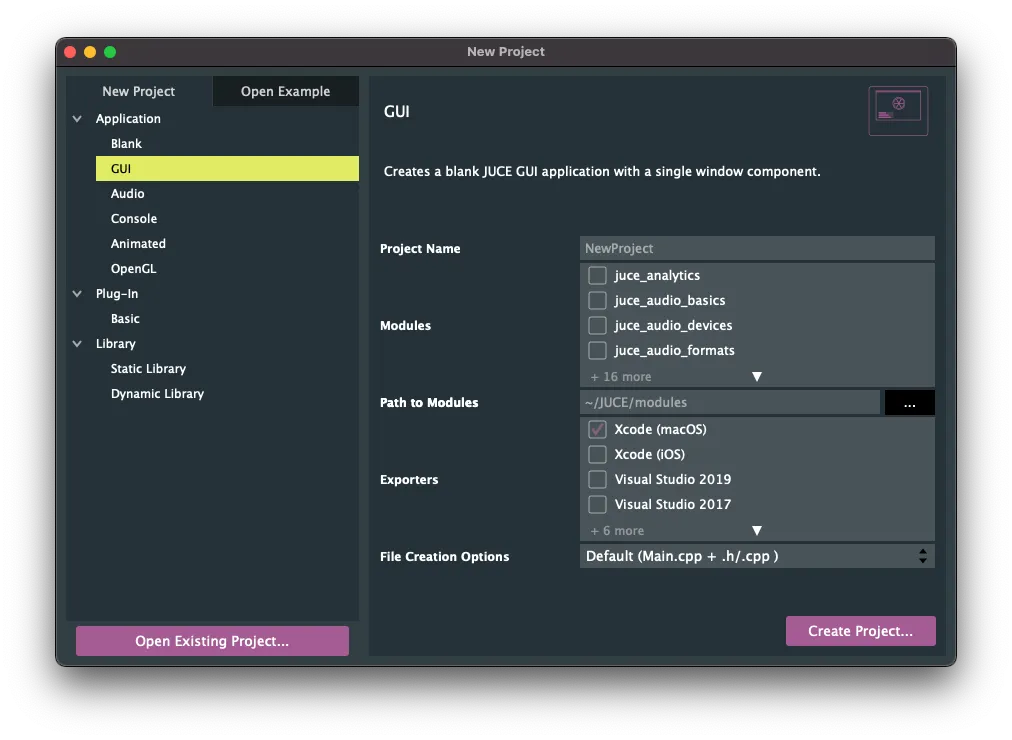
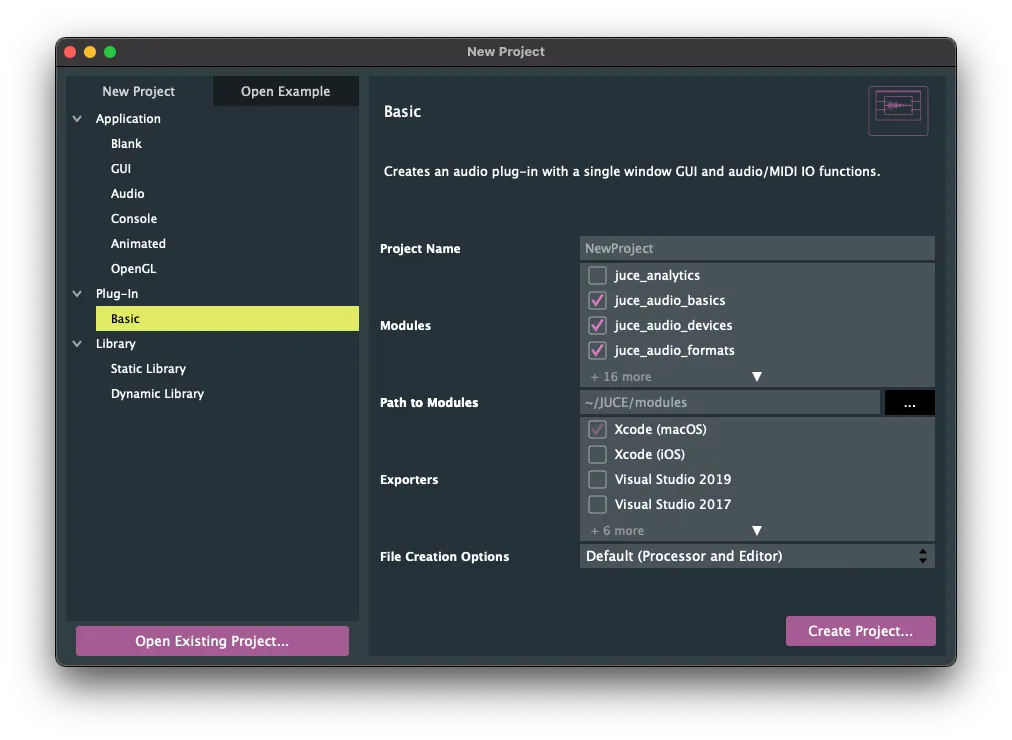
1.2. New Project
JUCE App에서 New Project를 선택 후, Plugin/Basic를 선택해줍니다. Project Name를 윈하는대로 설정해주고, Create Project를 눌러 프로젝트를 생성해줍니다.
이후, 아래와 같은 폴더구조를 가진 프로젝트가 생성됩니다.

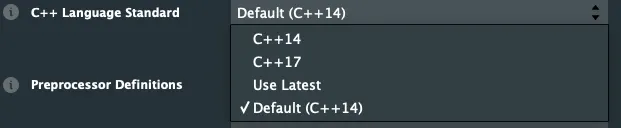
C++17를 사용할 것이기 떄문에, JUCE에서 설정버튼을 누른 후, C++ Language Standard를 C++17로 설정해줍니다.
2. Creating Audio Parameters
2.1. 코드 구조
만들어진 프로젝트의 PluginProcessor.h를 보면 다음과 같은 함수들을 볼 수 있습니다.
class SimpleEQAudioProcessor : public juce::AudioProcessor
{
public:
//==============================================================================
SimpleEQAudioProcessor();
~SimpleEQAudioProcessor() override;
//==============================================================================
void prepareToPlay (double sampleRate, int samplesPerBlock) override;
// 생략
void processBlock (juce::AudioBuffer<float>&, juce::MidiBuffer&) override;
// 생략
};
C++
복사
•
processToPlay()는 playback를 시작할 때 불립니다. (즉, 재생의 준비가 완료되면 이 함수가 불리게 됩니다.)
•
processBlock()는 playback이 시작되고, 계속 불리게 됩니다. 일정 길이만큼 AudioBuffer 형태로 입력 오디오 정보가 계속 들어오게 됩니다.
이 예제에서는 SimpleEQ라는 이름의 프로젝트를 만들어서, SimpleEQAudioProcessor라는 클래스가 만들어진 것을 확인할 수 있습니다. 이 AudioProcessor에 우리가 윈하는 오디오처리를 구현해야 한다고 볼 수 있습니다.
프로젝트의 PluginEditor.h는 별다른 설명은 하지 않겠지만, 주로 해당 가상악기 플러그인을 불러왔을 떄의 UI 구현을 담당합니다. 이 코드를 수정하여 노브나, 슬라이더 등 가상악기에 필요한 UI컴포넌트들을 구현하게 됩니다.
2.2. Parameter 관리를 위한 TreeState
JUCE에서는 DSP, 즉 오디오 프로세싱 코드에서의 state와 UI에서의 state를 함께 관리하기 위해서 AudioProcessorValueTreeState를 사용합니다. 여기서 state라는 것은 볼륨슬라이더나 파라미터 노브와 같이 가상악기에서 우리가 설정할 수 있는 파라미터들을 말합니다. AudioProcessor.h에서 다음과 같이 선언해줍니다.
static juce::AudioProcessorValueTreeState::ParameterLayout createParameterLayout();
juce::AudioProcessorValueTreeState apvts {*this, nullptr, "Parameters", createParameterLayout()};
C++
복사
AudioProcessorValueTreeState는 다음과 같은 생성자의 인자를 갖습니다.
•
AudioProcessor& processorToConnectTo : 해당 오디오 프로세서를 연결할 클래스를 담습니다.
•
UndoManager* undoManagerToUse : 아직 모르지만, 차후 UndoManager를 구현할 떄 사용하나봅니다.
•
const Identifier& valueTreeType : Parameter의 이름과 같이 어떤 Parameter인지 식별할 수 있는 정보를 담습니다.
•
ParameterLayout parameterLayout : 필요한 Parameter들을 담은 ParameterLayout 객체를 여기에 넣어줍니다.
본 예제에서는 다음의 파라메타를 가지는 가상악기 필터를 만들려고 합니다.
•
3 Band EQ : Low, High, Parametric/Peak
•
Cut Bands : Controllable Frequency/Slope
•
Parametric Band : Controllable Frequency, Gain, Quality
AudioParameter는 JUCE의 AudioProcessorParameter를 통해 관리될 수 있습니다. 공식 문서를 보면 아래와 같은 상속구조를 가진다고 합니다.
우선, 우리는 하나의 실수값을 가지는 파라미터를 만들어볼 것이기에 AudioParameterFloat를 사용해 보겠습니다. 파라미터는 ParameterLayout을 통해 관리되며, 위에서 선언한 createParameterLayout()에 필요한 파라미터들을 담은 ParameterLayout을 반환하도록 구현합니다.
juce::AudioProcessorValueTreeState::ParameterLayout SimpleEQAudioProcessor::createParameterLayout()
{
juce::AudioProcessorValueTreeState::ParameterLayout layout;
layout.add(std::make_unique<juce::AudioParameterFloat>("LowCut Freq", "LowCut Freq", juce::NormalisableRange<float>(20.f, 20000.f, 1.f, 1.f), 20.f));
layout.add(std::make_unique<juce::AudioParameterFloat>("HighCut Freq", "HighCut Freq", juce::NormalisableRange<float>(20.f, 20000.f, 1.f, 1.f), 20000.f));
layout.add(std::make_unique<juce::AudioParameterFloat>("Peak Freq", "Peak Freq", juce::NormalisableRange<float>(20.f, 20000.f, 1.f, 1.f), 1.f));
layout.add(std::make_unique<juce::AudioParameterFloat>("Peak Gain", "Peak Gain", juce::NormalisableRange<float>(-24.f, 24.f, 0.5f, 1.f), 1.f));
layout.add(std::make_unique<juce::AudioParameterFloat>("Peak Quality", "Peak Quality", juce::NormalisableRange<float>(0.1f, 10.f, 0.05f, 1.f), 1.f));
juce::StringArray stringArray;
for( int i = 0; i < 4; ++i )
{
juce::String str;
str << (12 + i * 12);
str << " db/Oct";
stringArray.add(str);
}
layout.add(std::make_unique<juce::AudioParameterChoice>("LowCut Slope", "LowCut Slope", stringArray, 0));
layout.add(std::make_unique<juce::AudioParameterChoice>("HighCut Slope", "HighCut Slope", stringArray, 0));
return layout;
}
C++
복사
•
AudioParameterFloat의 경우에는 슬라이더를 고려하여 NormalisableRange를 통해 최솟값, 최대값, step size(슬라이더의 간격입니다.), skew param(작은값 주변의 슬라이더 밀도를 키울지, 높은값 주변의 슬라이더 밀도를 키울지를 정하는 파라미터입니다.)를 결정하도록 할 수 있습니다. 맨 끝 인자는 초기값입니다.
•
Float값이 아닌, 파라미터를 선택할 수 있는 형태로 만들고 싶다면 AudioParameterChoice를 사용할 수 있습니다. StringArray형태의 선택지들을 만든 후, 이를 AudioParameterChoice에 넘겨줍니다.
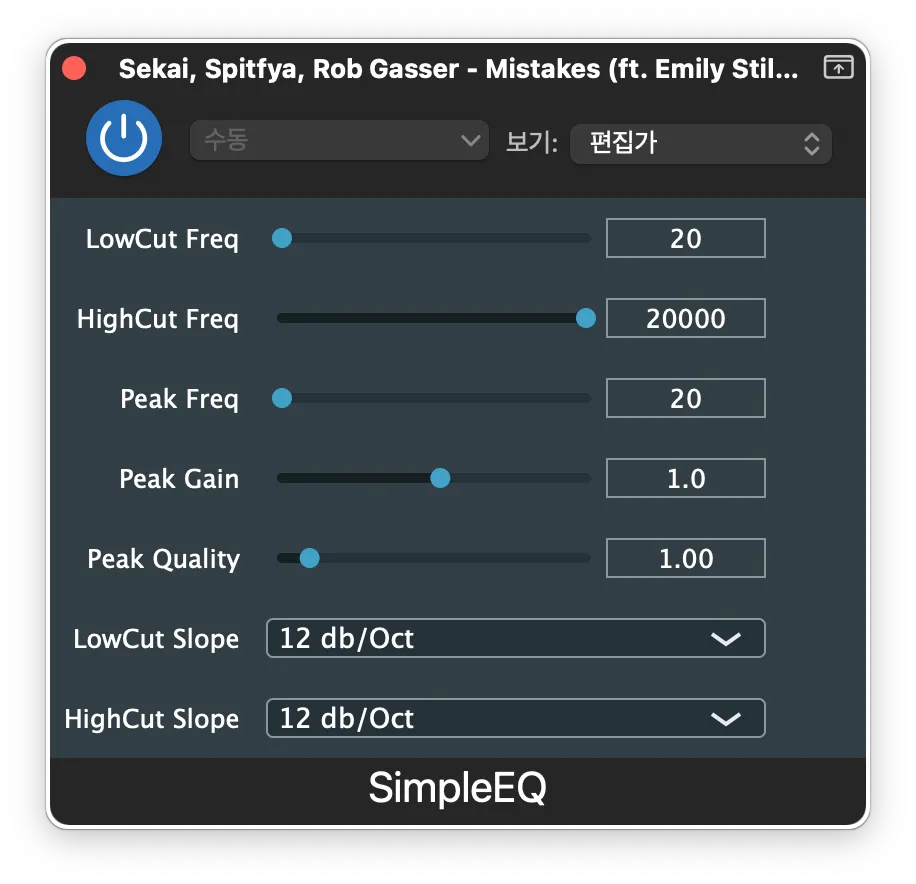
2.3. 간단한 UI로 Parameter 바꾸어보기
여기까지 구현한 후 UI를 보고자 한다면, PluginProcessor의 createEditor()를 잠깐 다음과 같이 수정해줍니다.
juce::AudioProcessorEditor* SimpleEQAudioProcessor::createEditor()
{
//return new SimpleEQAudioProcessorEditor (*this);
return new juce::GenericAudioProcessorEditor(*this);
}
C++
복사
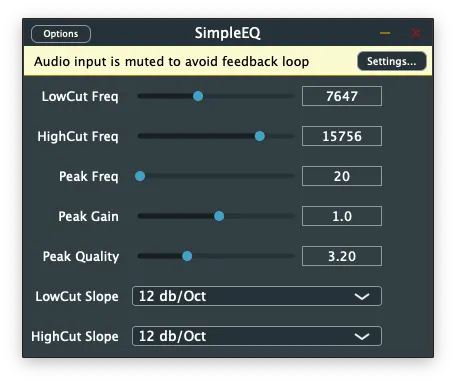
실행하면 다음과 같은 플러그인의 모습을 확인할 수 있습니다.
3. Implementing DSP
3.1. JUCE DSP Module 추가
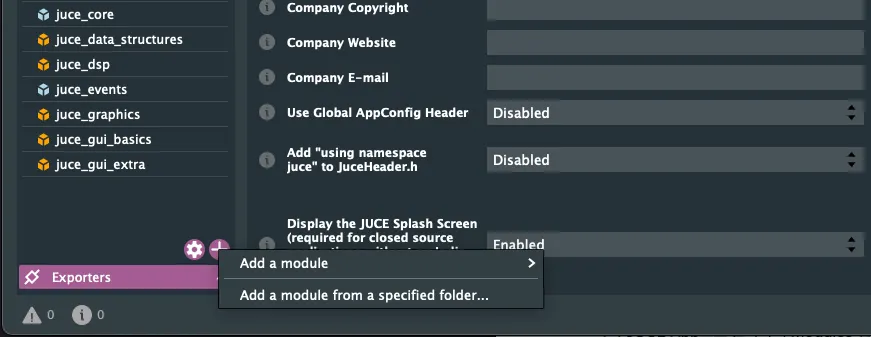
다시 JUCE App으로 돌아와서 Modules 탭에서 아래에 있는 + 버튼을 누릅니다. 그 후, Add a module/Global~/juce_dsp를 선택하여 Juce DSP를 추가해줍니다.
3.2. Filter ProcessorChain 만들기
JUCE에서는 ProcessorChain을 통해 여러개의 DSP 필터를 병렬로 적용시킬 수 있습니다. 우선, 이를 위해 Processor 헤더에 다음과 같은 alias들을 만들어줍니다. (현재 구현하고자 하는 것은 12, 24, 36, 48dB에 해당하는 Slope를 가진 CutFilter들을 병렬적으로 적용하기 위해 4개의 Filter를 먹여주었습니다.)
using Filter = juce::dsp::IIR::Filter<float>;
using CutFilter = juce::dsp::ProcessorChain<Filter, Filter, Filter, Filter>;
using MonoChain = juce::dsp::ProcessorChain<CutFilter, Filter, CutFilter>;
C++
복사
그리고, 아래와 같이 스테레오 처리를 위해 leftChain과 rightChain을 만들어줍니다.
MonoChain leftChain, rightChain;
C++
복사
이후, prepareToPlay()에서 입력되는 spec에 따라 chain을 prepare시켜줍니다.
void SimpleEQAudioProcessor::prepareToPlay (...)
{
// Use this method as the place to do any pre-playback
// initialisation that you need..
juce::dsp::ProcessSpec spec;
spec.maximumBlockSize = samplesPerBlock;
spec.numChannels = 1;
spec.sampleRate = sampleRate;
leftChain.prepare(spec);
rightChain.prepare(spec);
}
C++
복사
3.3. ProcessorChain을 오디오 처리 로직에 반영 (processBlock())
이렇게 만들어준 processChain을 실제 오디오 처리 로직에 반영할 차례입니다. 우선, 처리해주기 위해 들어오는 오디오 버퍼를 dsp::AudioBlock의 형태로 불러와줍니다.
void SimpleEQAudioProcessor::processBlock (...)
{
...
juce::dsp::AudioBlock<float> block(buffer);
}
C++
복사
그리고, 스테레오의 오디오블럭을 왼쪽과 오른쪽으로 나누어주기 위해 getSingleChannelBlock(channel)을 통해 왼쪽과 오른쪽으로 나누어줍니다. 보통 0번 인덱스는 Left, 1번 인덱스는 Right를 의미합니다.
auto leftBlock = block.getSingleChannelBlock(0);
auto rightBlock = block.getSingleChannelBlock(1);
C++
복사
JUCE에서 오디오처리는 AudioBlock형태의 입력/출력 Array로 두고, 오디오 처리와 관련된 버퍼나 파라미터들을 관리하는 ProcessContext를 둡니다. 이 context를 ProcessorChain에게 넘겨주어서 process(context)함수를 호출하면 오디오처리 로직이 동작하게 됩니다.
ProcessContext는 ProcessContextReplacing과 ProcessContextNonReplacing으로 나뉩니다. 공식 Description을 보면 아래와 같은 차이점을 발견할 수 있습니다.
ProcessContextReplacing

Contains context information that is passed into an algorithm's process method.
This context is intended for use in situations where a single block is being used for both the input and output, so it will return the same object for both its getInputBlock() and getOutputBlock() methods.
ProcessContetNonReplacing
Contains context information that is passed into an algorithm's process method.
This context is intended for use in situations where two different blocks are being used the input and output to the process algorithm, so the processor must read from the block returned by getInputBlock() and write its results to the block returned by getOutputBlock().
즉, ContextReplacing은 말 그대로 입력되는 AudioBlock에 오디오처리 결과를 덮어쓰게 되고, ContextNonReplacing은 InputBlock과 OutputBlock을 따로 두어 InputBlock에 덮어쓰지 않고, OutputBlock에 오디오처리 결과를 따로 저장하게 되는 방식이 됩니다.
지금 예시에서는 굳이 InputBlock과 OutputBlock을 따로 둘 필요가 없으므로, ProcessContextNonBlocking을 사용하도록 하겠습니다.
아래와 같이 Context를 만들고, process 함수를 호출할 수 있습니다.
juce::dsp::ProcessContextReplacing<float> leftContext(leftBlock);
juce::dsp::ProcessContextReplacing<float> rightContext(rightBlock);
leftChain.process(leftContext);
rightChain.process(rightContext);
C++
복사
이렇게 하면 오디오 필터들을 적용할 수 있습니다!
3.4. AudioPluginHost로 만든 플러그인 테스트하기
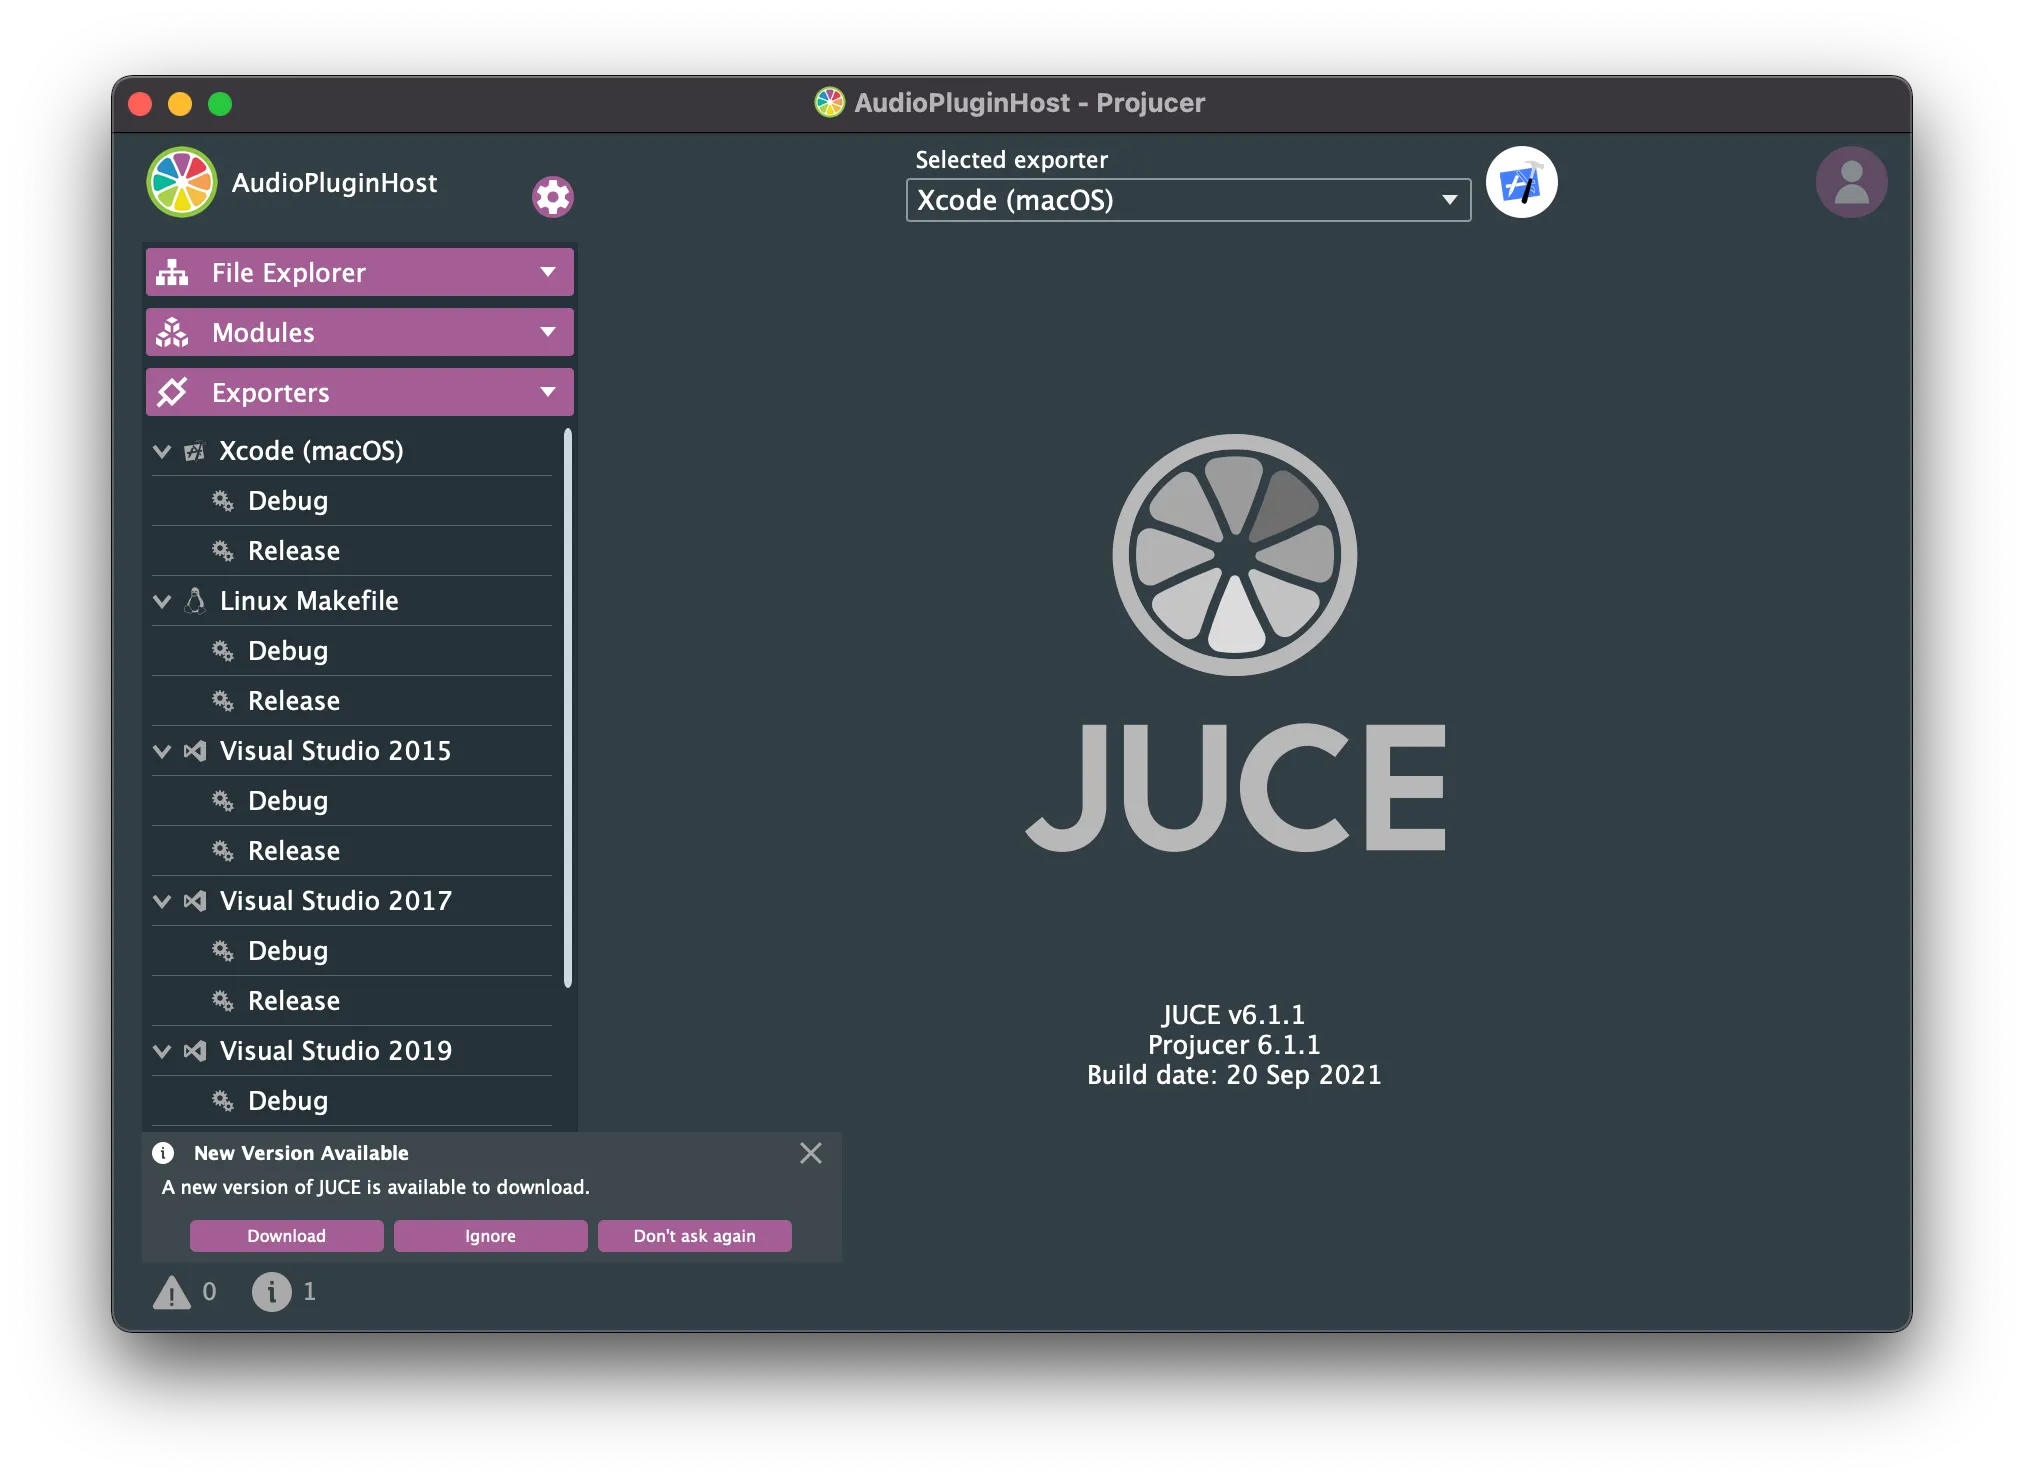
이렇게 만든 오디오 플러그인을 빌드해서 DAW에서 직접 테스트해볼 수 있지만, JUCE에서는 간단하게 오디오를 테스트로 집어넣어서 그 결과를 구현한 필터에서 확인할 수 있는 툴을 제공합니다. AudioPluginHost는 여타 다른 JUCE툴과 마찬가지로 JUCE/extras/AudioPluginHost/AudioPluginHost.jucer에 있습니다. 더블클릭하여 열어줍니다.
XCode Icon을 누르면 Saving이 뜨면서, XCode가 실행되게 됩니다. CMD + B로 빌드시켜줍니다.
빌드가 완료되었으면 Builds/<YOUR_PLATFORM>/build/Debug/AudioPluginHost를 실행시켜줍니다.
메뉴바의 Options에서 Edit the list of Available Plug-ins... 를 눌러줍니다.
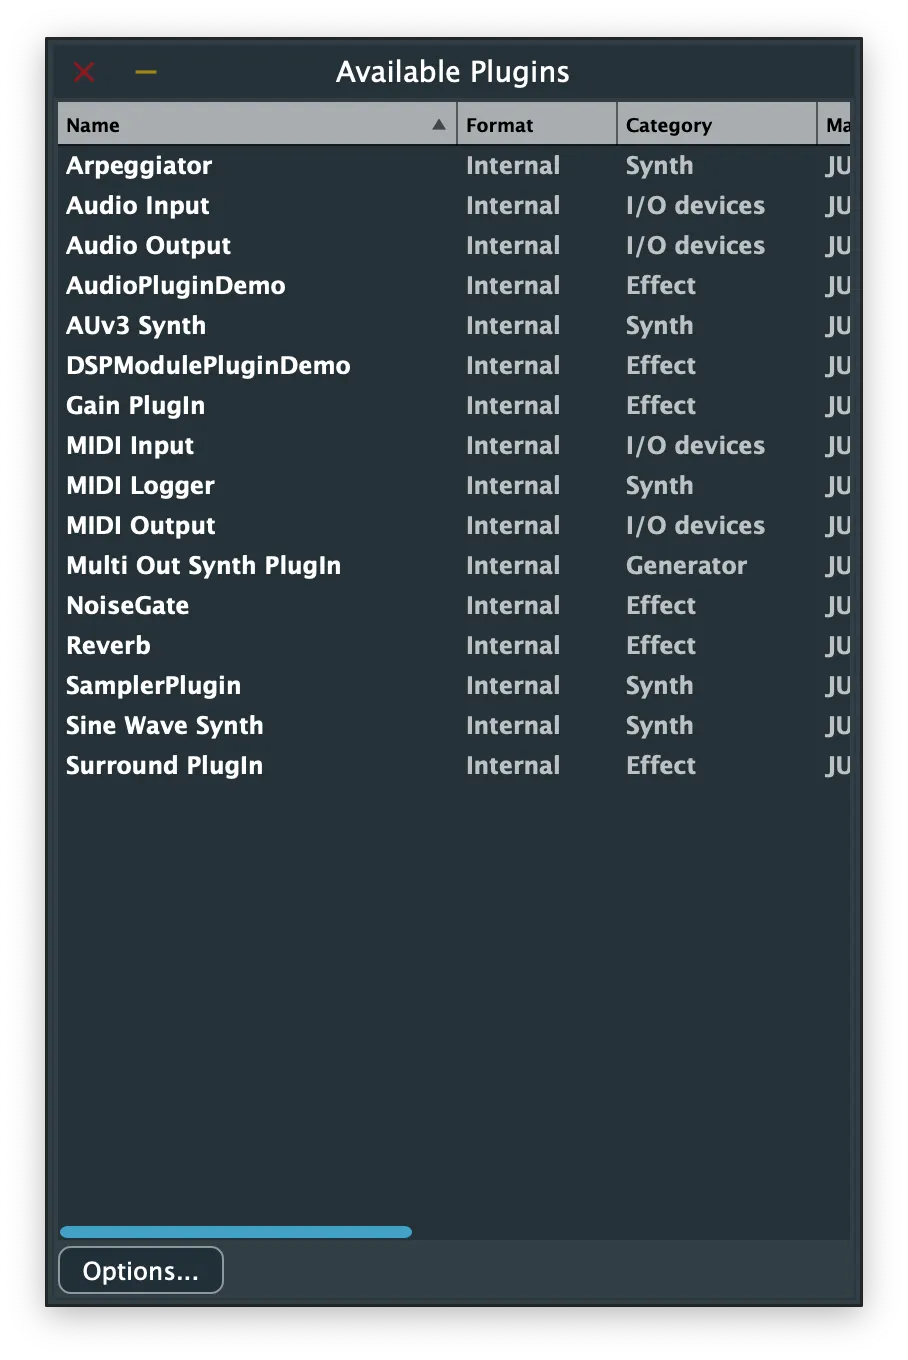
이런 창이 뜨면, Options → Scan for new or updated AudioUnit plug-ins를 눌러줍니다.
SimpleEQ(만든 이름의 플러그인)이 잘 떴는지 확인합니다.
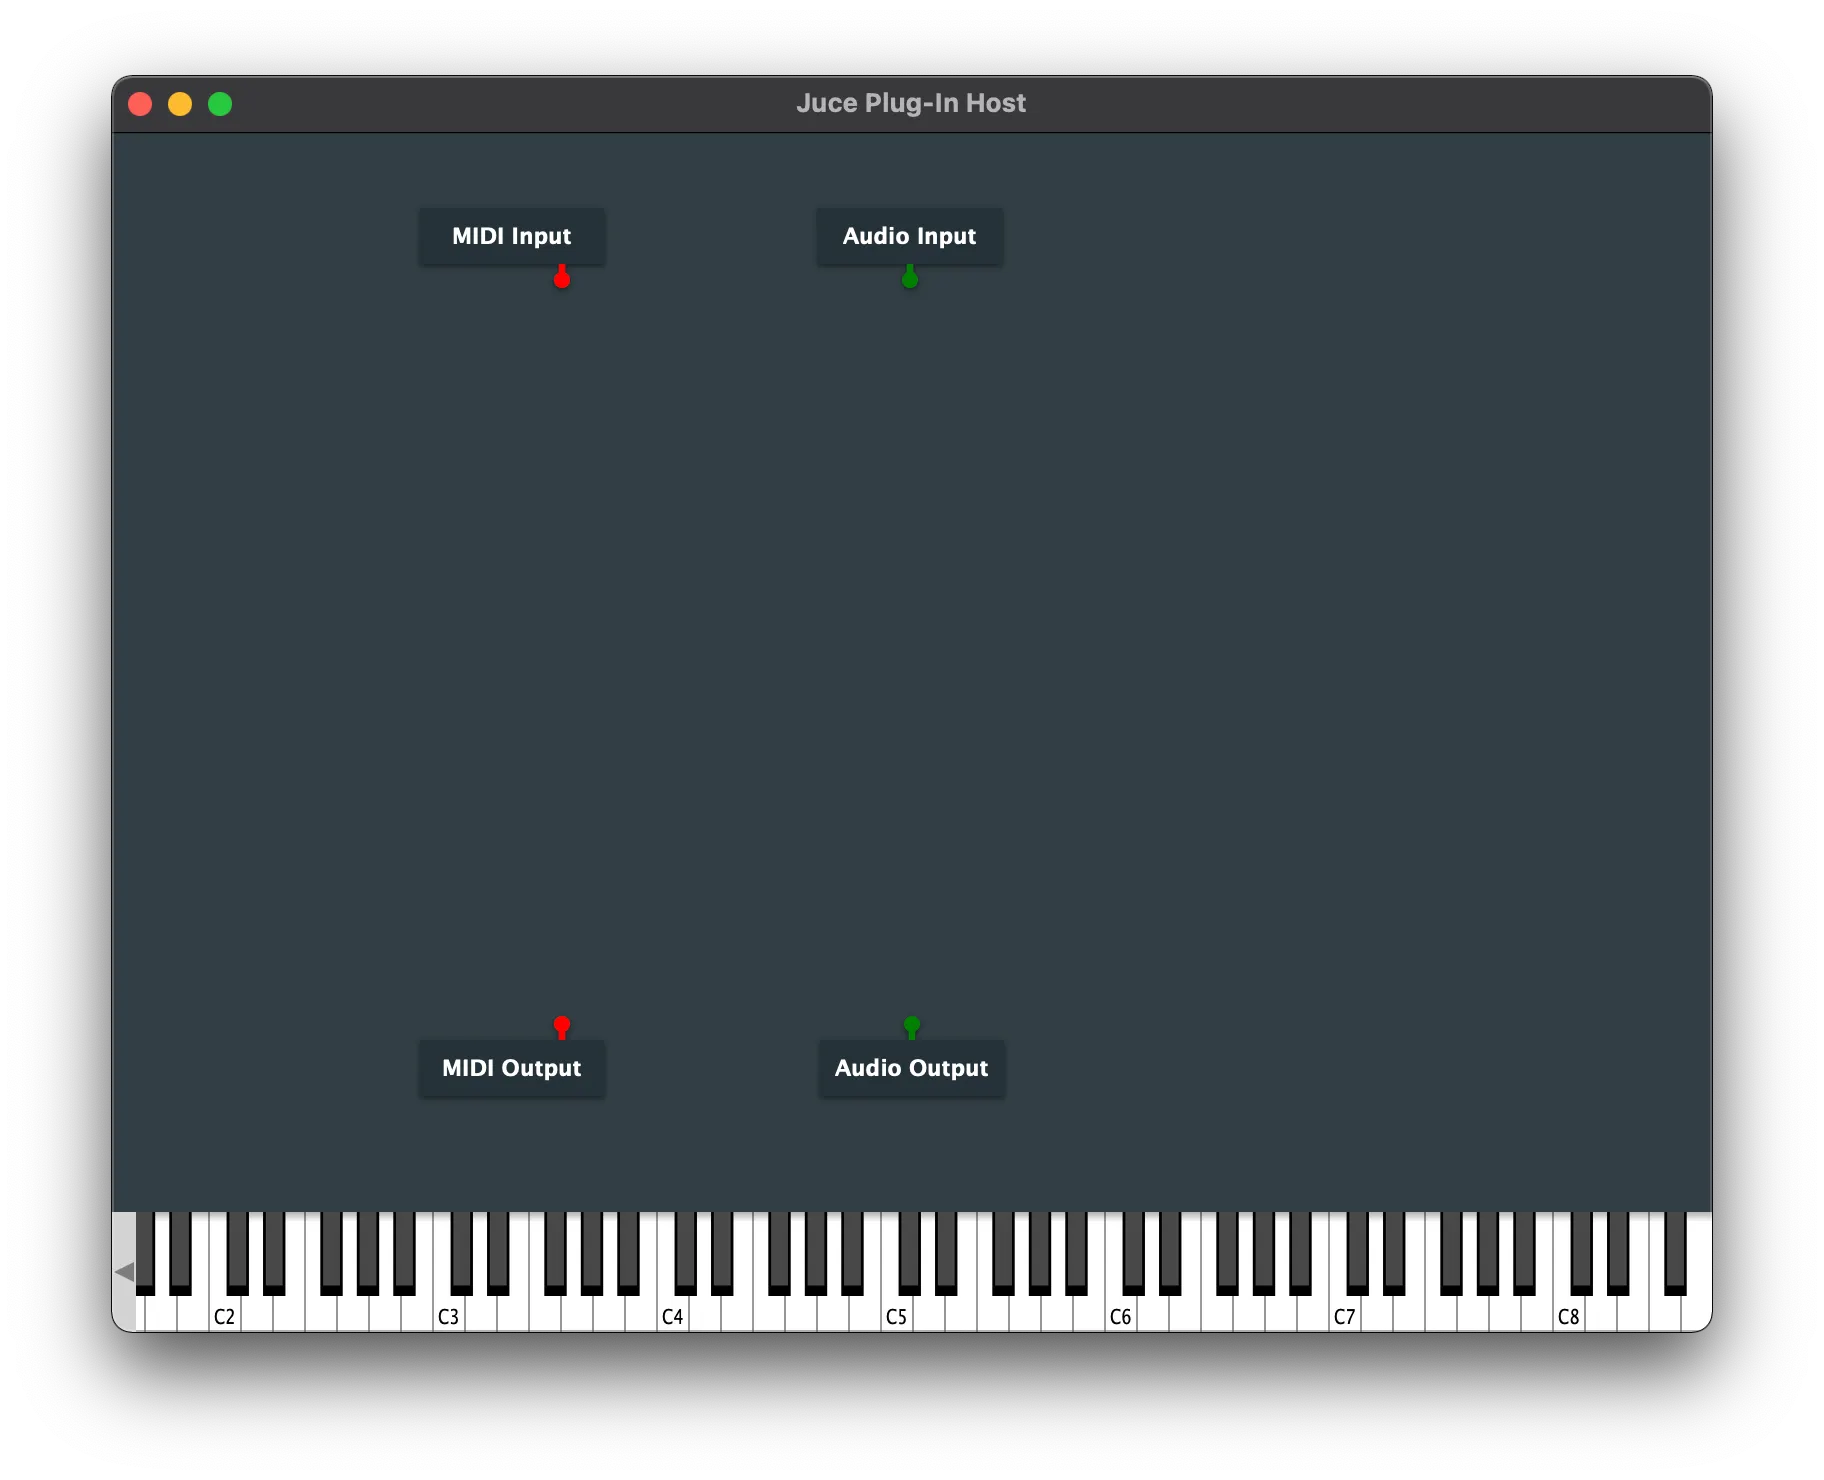
이후, 다시 AudioPluginHost로 돌아와서 빈 공간에 우클릭을 합니다.
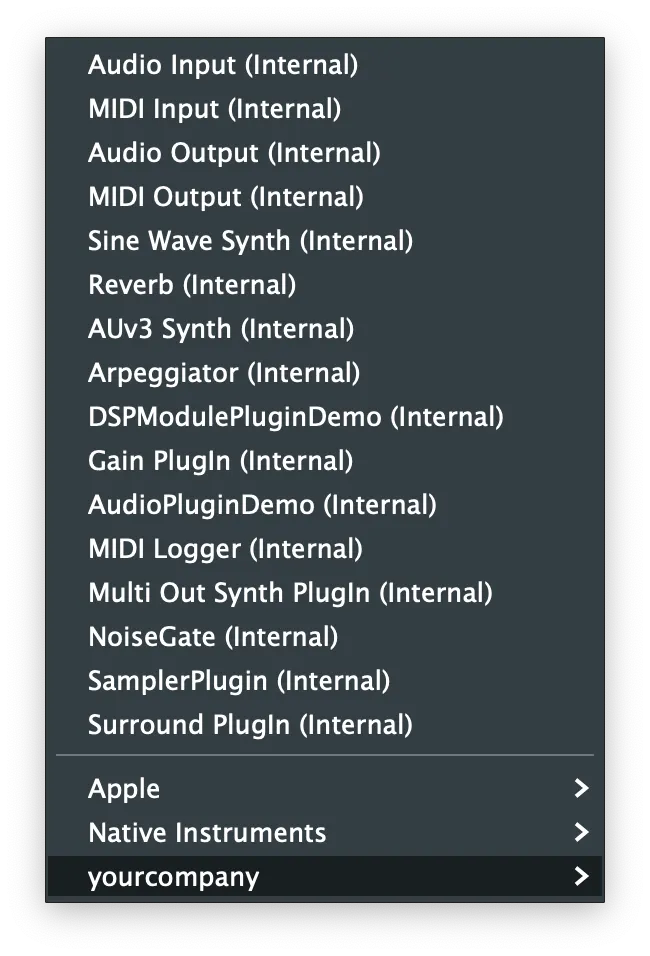
yourcompany(회사를 설정했으면 회사명)/SimpleEQ를 눌러서 만든 플러그인을 불러옵니다.
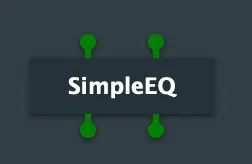
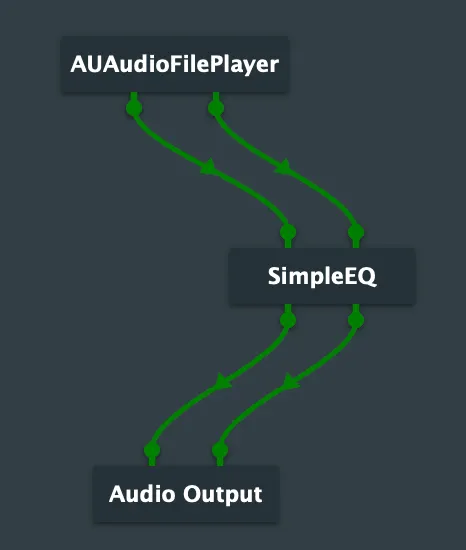
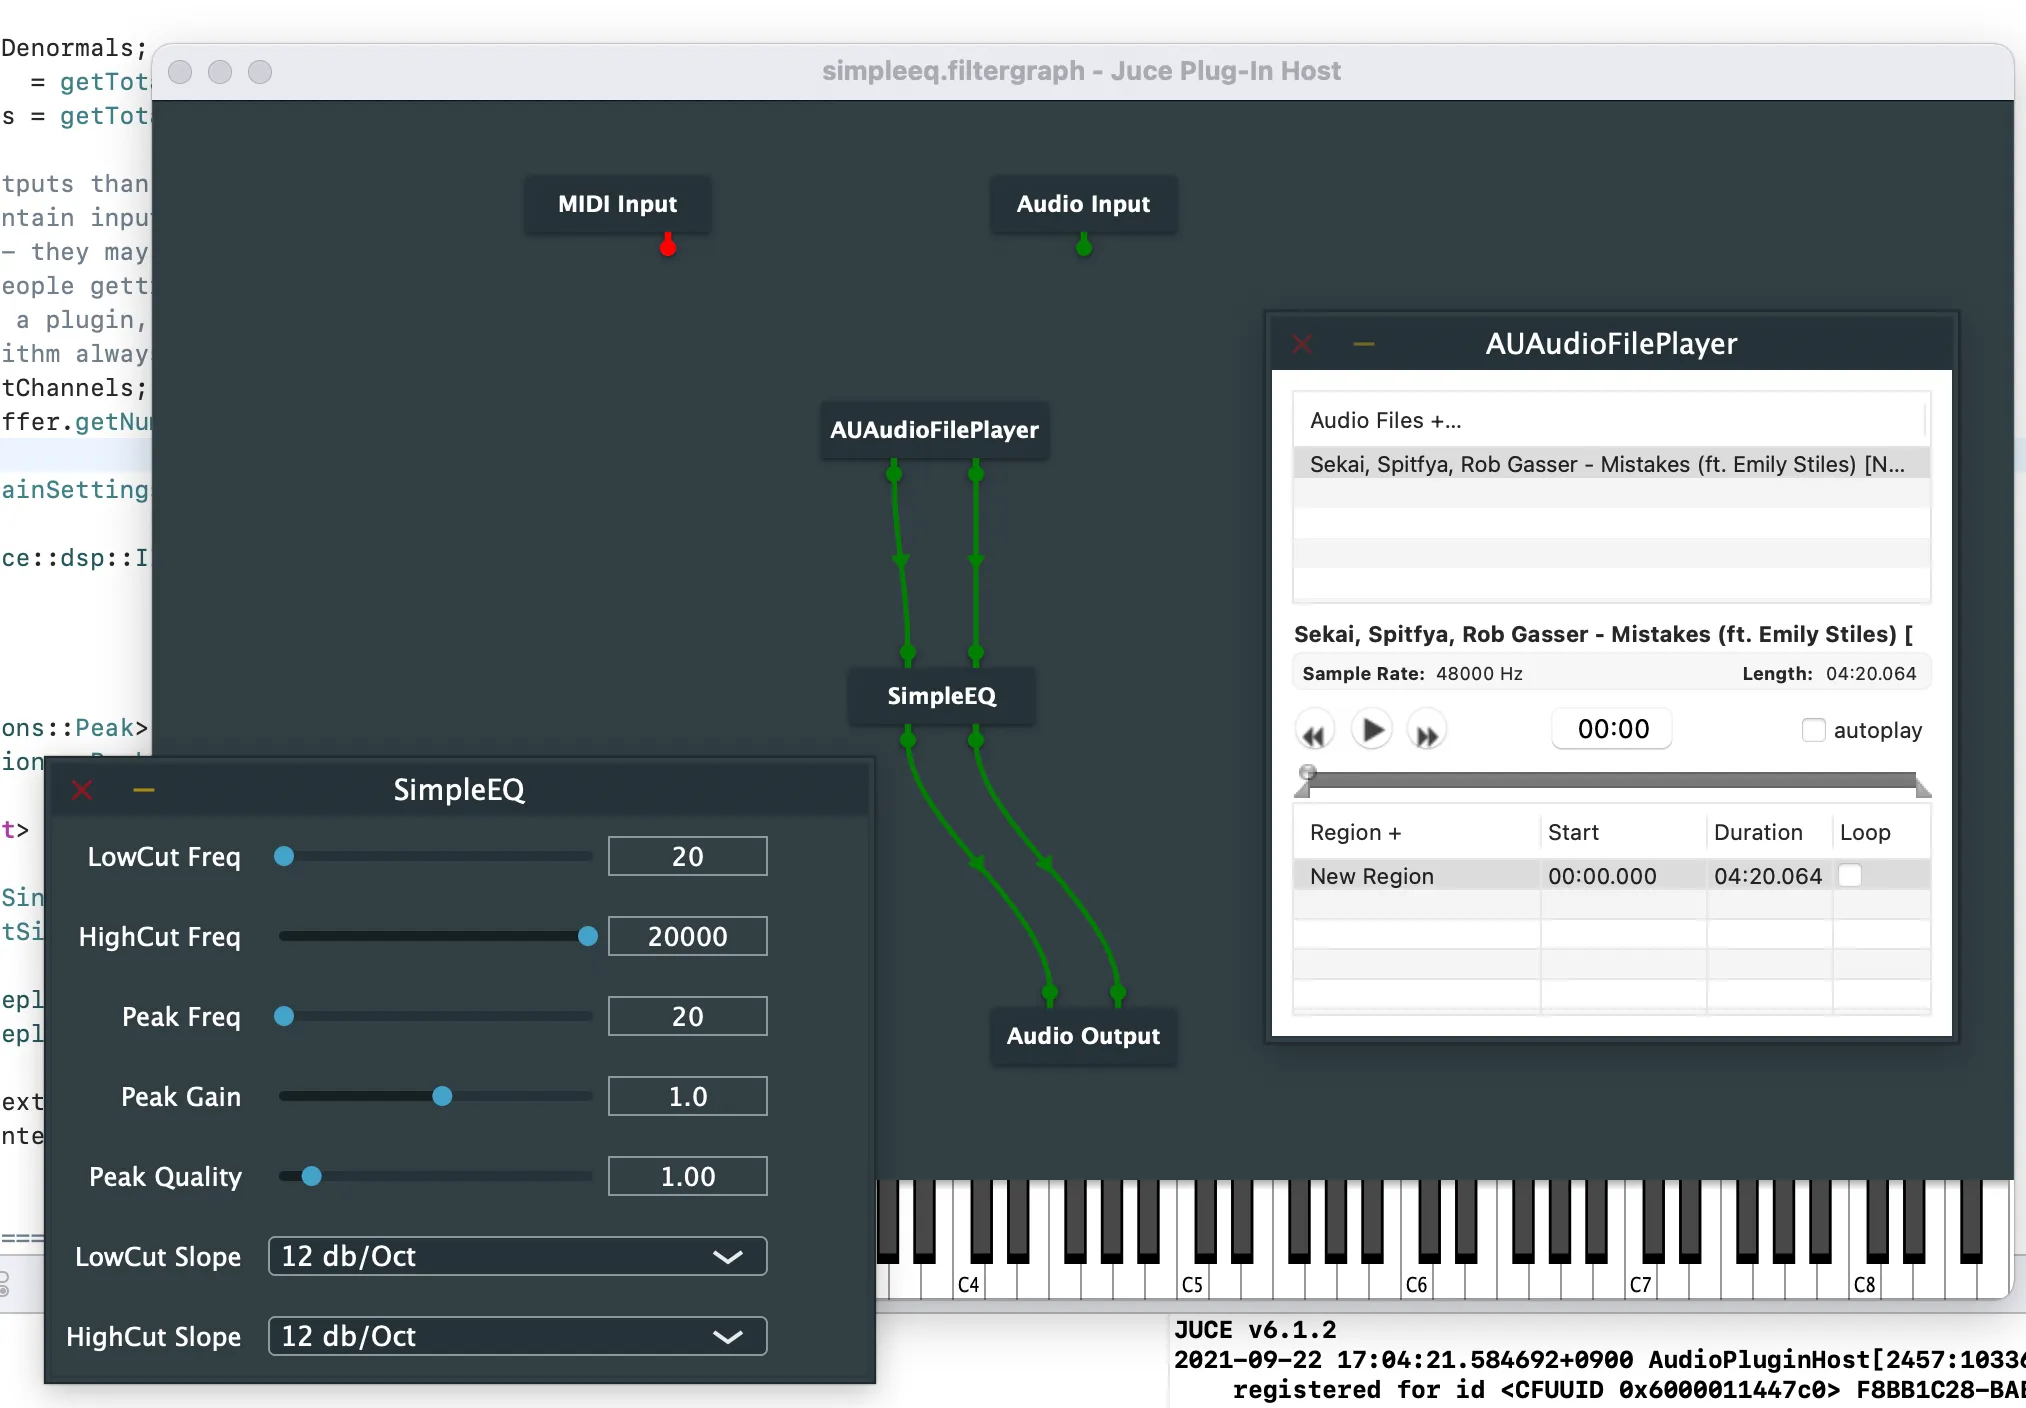
AudioFile를 불러와서 테스트해보기 위해서 Wav를 읽어올 수 있는 플러그인을 불러옵니다. 똑같이 우클릭 후, Apple/AUAudioFilePlayer를 불러와줍니다. 그리고 아래와 같이 연결해줍니다.
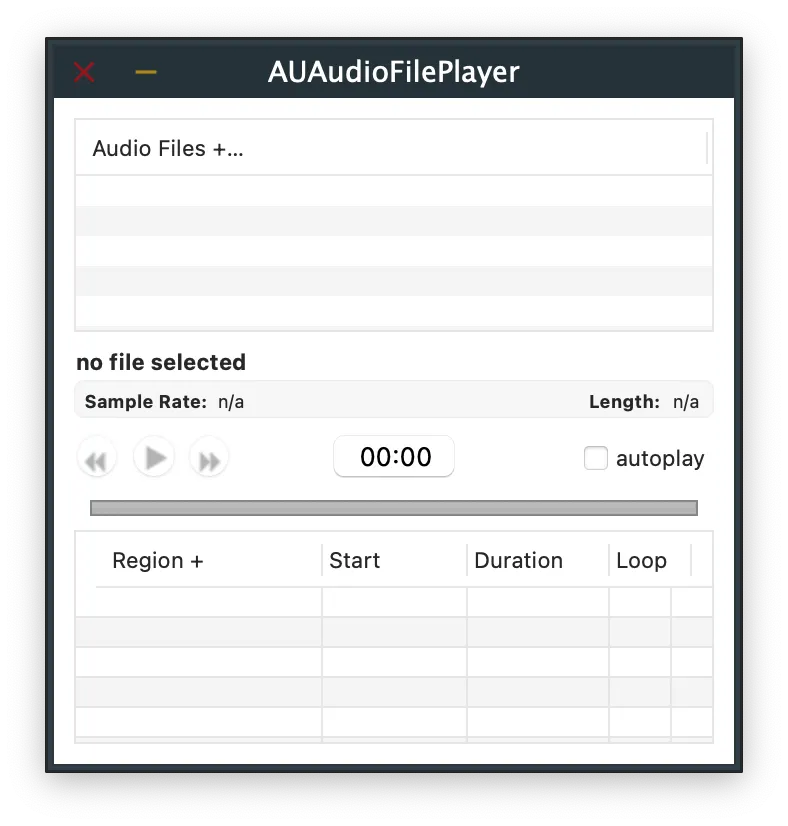
테스트로 AUAudioFilePlayer를 더블클릭 후, 오디오를 불러와서 재생해봅니다. 아직 SimpleEQ의 파라미터를 바꾸어도 소리의 변화가 없는 것이 정상입니다.
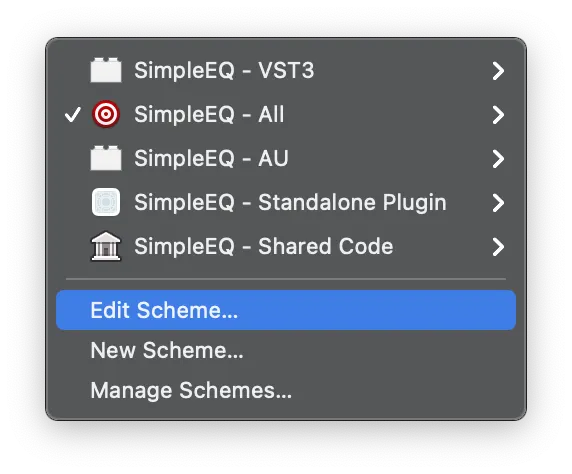
개발의 편의성을 위해서 XCode로 빌드를 하면 AudioPluginHost를 자동으로 띄우도록 해보겠습니다. XCode의 실행버튼 옆에 있는 Target Select하는 부분을 클릭 후, Edit Scheme를 클릭해줍니다.
이후, SimpleEQ - AU를 클릭 후, Executable를 AudioPluginHost로 설정해줍니다.
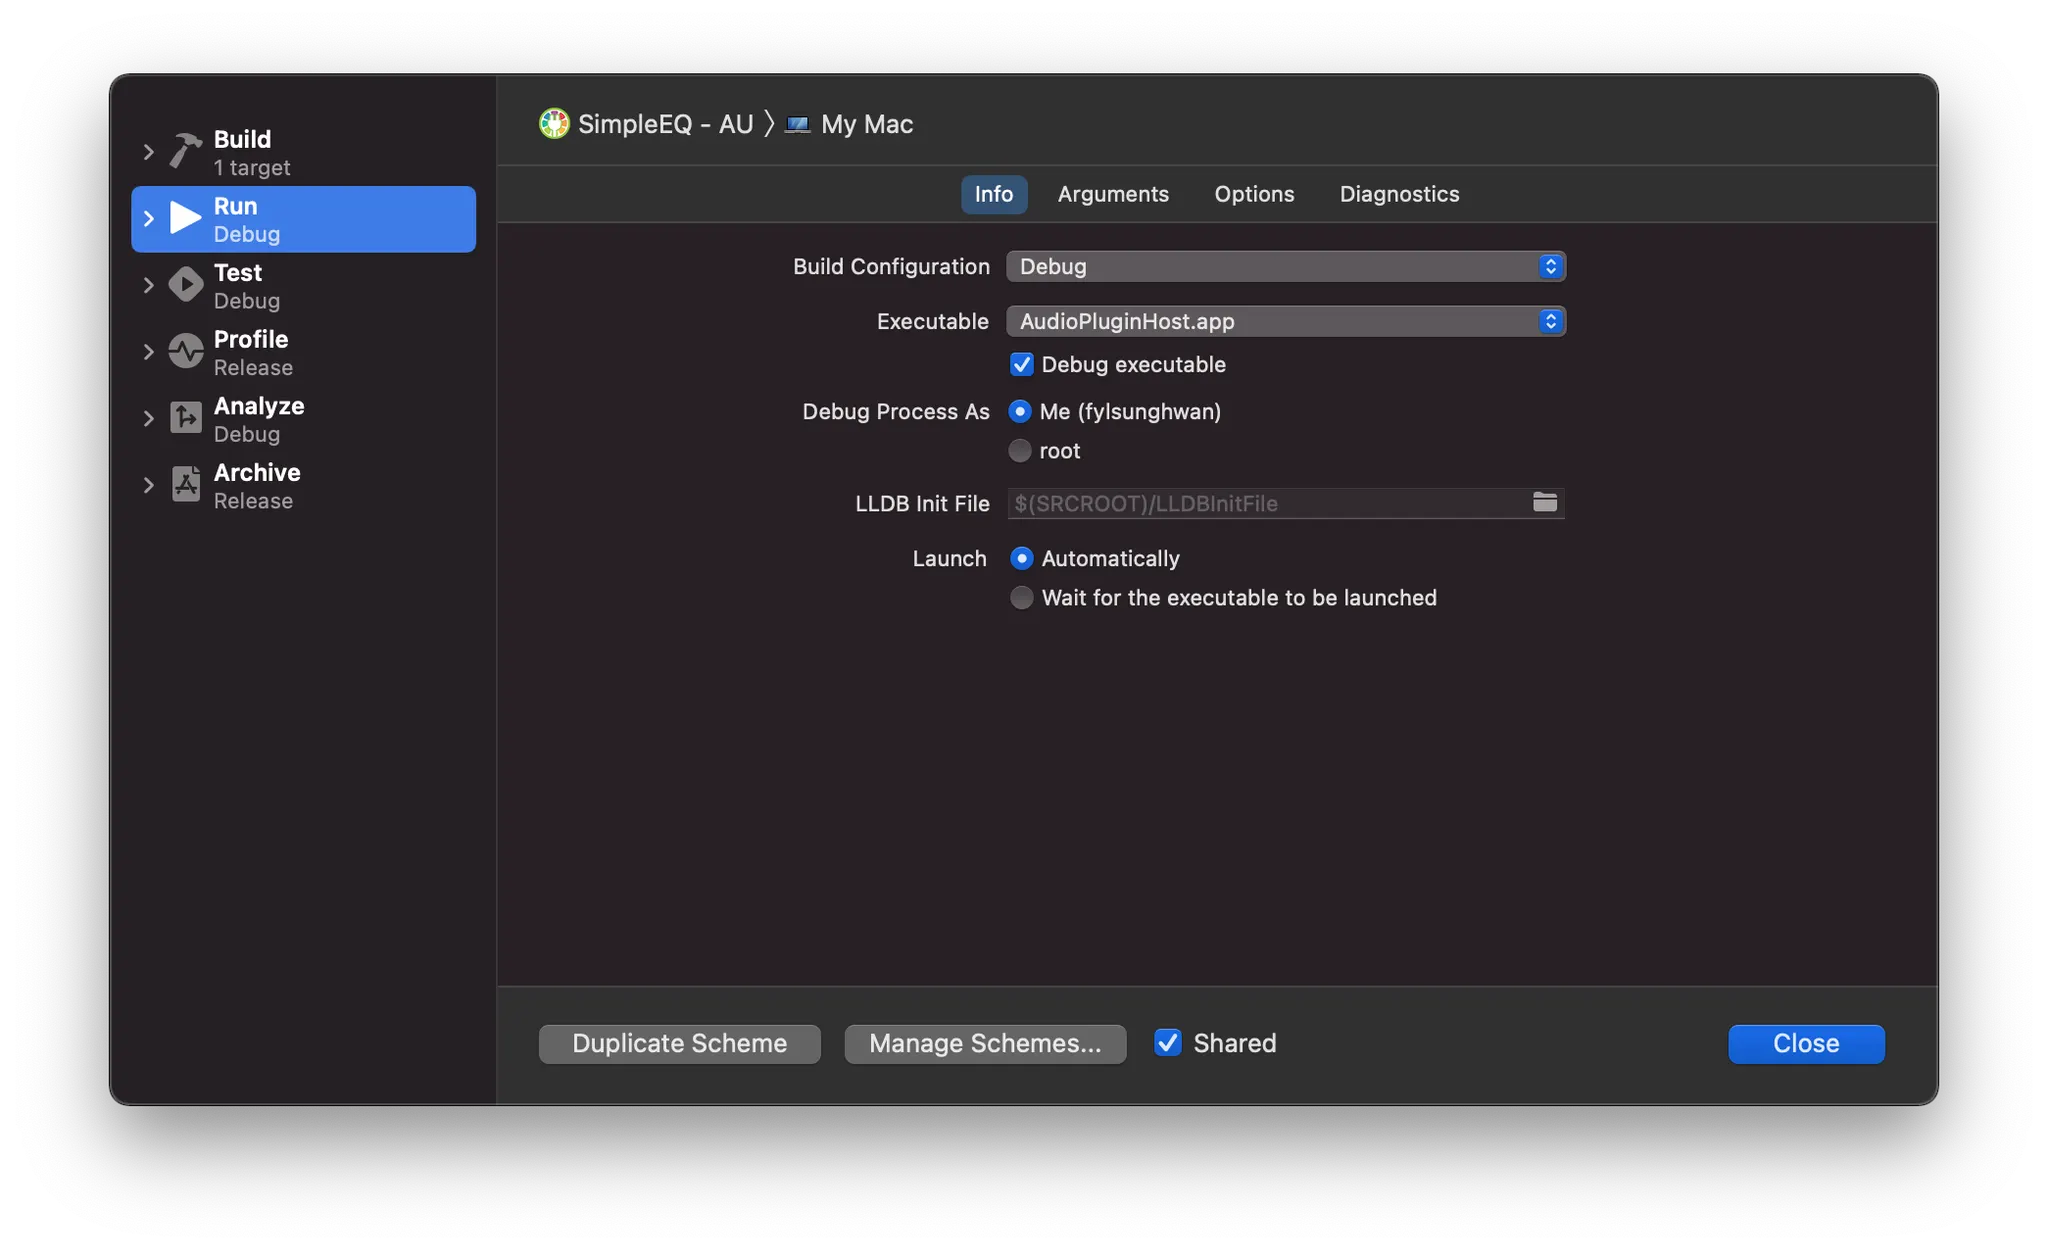
실행해보면 아래와 같이 AudioPluginHost가 잘 실행되는 것을 확인할 수 있습니다. 이렇게 설정해두면, 만든 오디오 플러그인을 Breakpoint를 찍어서 디버깅이 가능합니다.
3.5. Peak Filter와 Parameter, 그리고 Process Chain 연결하기
이제 앞서 만든 Parameter TreeState와 실제 DSP 로직, 그리고 Process Chain에 이 모든 것을 반영할 차례입니다.
우선, Parameter를 Struct로 관리하기 위해 아래와 같은 Struct와 Helper Function을 AudioProcessor 해더에 추가합니다.
enum Slope
{
Slope_12,
Slope_24,
Slope_36,
Slope_48
};
struct ChainSettings
{
float peakFreq { }, peakGainInDecibels{ 0 }, peakQuality { 1.f };
float lowCutFreq { 0 }, highCutFreq { 0 };
Slope lowCutSlope { Slope::Slope_12 }, highCutSlope { Slope::Slope_12 };
};
ChainSettings getChainSettings(juce::AudioProcessorValueTreeState& apvts);
C++
복사
getChainSettings를 구현하여 Parameter TreeState로부터 값을 얻어옵니다.
ChainSettings getChainSettings(juce::AudioProcessorValueTreeState& apvts)
{
ChainSettings settings;
settings.lowCutFreq = apvts.getRawParameterValue("LowCut Freq")->load();
settings.highCutFreq = apvts.getRawParameterValue("HighCut Freq")->load();
settings.peakFreq = apvts.getRawParameterValue("Peak Freq")->load();
settings.peakGainInDecibels = apvts.getRawParameterValue("Peak Gain")->load();
settings.peakQuality = apvts.getRawParameterValue("Peak Quality")->load();
settings.lowCutSlope = apvts.getRawParameterValue("LowCut Slope")->load();
settings.highCutSlope = apvts.getRawParameterValue("HighCut Slope")->load();
return settings;
}
C++
복사
이제, 이 Parameter들을 바탕으로 실제 필터에 적용시켜보겠습니다. 우선, 앞서 스테레오 처리를 위해 leftChain과 rightChain을 만들었는데, 이 MonoChain은 다음 세개의 필터를 가진 Alias 였습니다.
using MonoChain = juce::dsp::ProcessorChain<CutFilter, Filter, CutFilter>;
C++
복사
앞에있는 CutFilter를 본 예제에서는 LowCut Filter용으로 사용할 것이고, 중간의 Filter는 Peak Filter를, 뒤에 있는 Filter는 HighCut Filter용으로 사용하려 합니다. 이를 지정하기 위해서 다음과 같은 enum을 헤더에 넣어줍니다.
class SimpleEQAudioProcessor : public juce::AudioProcessor
{
public:
...
private:
...
enum ChainPositions
{
LowCut,
Peak,
HighCut
};
//==============================================================================
};
C++
복사
다시 구현으로 돌아와서, 다음과 같이 파라미터를 업데이트할 수 있는 코드를 작성합니다. Chain에 반영하기 위해 peakCoefficients의 값을 chain에서 불러온 Filter의 coefficients에 복사해줍니다. (헤더에도 추가해주세요!)
void SimpleEQAudioProcessor::updatePeakFilter(const ChainSettings &chainSettings)
{
auto peakCoefficients = juce::dsp::IIR::Coefficients<float>::makePeakFilter(getSampleRate(),
chainSettings.peakFreq,
chainSettings.peakQuality,
juce::Decibels::decibelsToGain(chainSettings.peakGainInDecibels));
updateCoefficients(leftChain.get<ChainPositions::Peak>().coefficients, peakCoefficients);
updateCoefficients(rightChain.get<ChainPositions::Peak>().coefficients, peakCoefficients);
}
void SimpleEQAudioProcessor::updateCoefficients(Coefficients &old, const Coefficients &replacements)
{
*old = *replacements;
}
void SimpleEQAudioProcessor::updateFilters()
{
auto chainSettings = getChainSettings(apvts);
updateLowCutFilters(chainSettings);
}
C++
복사
그리고, processBlock과 prepareToPlay에 추가합니다.
void SimpleEQAudioProcessor::processBlock (juce::AudioBuffer<float>& buffer, juce::MidiBuffer& midiMessages)
{
...
for (auto i = totalNumInputChannels; i < totalNumOutputChannels; ++i)
buffer.clear (i, 0, buffer.getNumSamples());
updateFilters();
...
}
void SimpleEQAudioProcessor::prepareToPlay (double sampleRate, int samplesPerBlock)
{
...
updateFilters();
}
C++
복사
이후 빌드 및 실행을 하여 peak Filter의 Parameter를 바꾸어가며 소리의 변화를 관찰해봅시다. 변화가 느껴지시나요? 그럼 성공하셨습니다
3.6. Cut Filter 연결하기
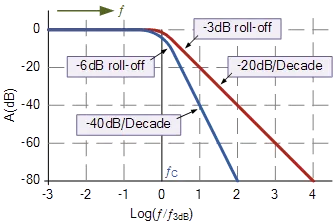
이제 LowCut, HighCut Filter를 구현하려 합니다. 앞서 언급된 바 LowCut과 HighCut Filter에는 4가지(12, 24, 36, 48db/Oct)의 Slope를 가지고 있습니다. Cut Filter에서 Slope는 아래 그래포와 같이 Cut-off Frequency에서 꺾어지는 그래프의 기울기를 말합니다.
이 Slope를 만들기 위해 'Butterworth Filter'를 사용해보려 합니다. 이를 위해 JUCE에서 제공하는 FilterDesign<FloatType>::designIIRHighpassHighOrderButterworthMethod()라는 헬퍼함수를 사용하려 합니다. 이에 앞서, Butterworth 필터는 order를 결정해주어야 하는데, 12, 24, 36, 48db/Oct는 각각 2, 4, 6, 8의 Order를 가지게 된다고 합니다.
결국에는 아래와 같이 Slope Choice에 따른 Order를 식으로 구해낼 수 있습니다.
Slope choice 0: 12 db/oct -> order: 2
Slope choice 1: 24 db/oct -> order: 4
Slope choice 2: 36 db/oct -> order: 6
Slope choice 3: 48 db/oct -> order: 8
Thus, order = (slopeChoice + 1) * 2
C++
복사
CutFilter를 Update시켜주는 코드를 작성하기 위해 아래와 같은 코드를 헤더에 작성해줍니다. Cut Filter의 Slope를 주기 위해 4개의 필터를 사용하며, Slope가 높아질수록 더 많은 필터를 사용하게 됩니다.
template<int Index, typename ChainType, typename CoefficientType>
void updateCutFilterElement(ChainType& chain, const CoefficientType& cutCoefficients)
{
updateCoefficients(chain.template get<Index>().coefficients, cutCoefficients[Index]);
chain.template setBypassed<Index>(false);
}
template<typename ChainType, typename CoefficientType>
void updateCutFilter(ChainType& lowCut,
const CoefficientType& cutCoefficients,
const Slope& lowCutSlope)
{
lowCut.template setBypassed<Slope::Slope_12>(true);
lowCut.template setBypassed<Slope::Slope_24>(true);
lowCut.template setBypassed<Slope::Slope_36>(true);
lowCut.template setBypassed<Slope::Slope_48>(true);
switch( lowCutSlope )
{
case Slope_48:
updateCutFilterElement<Slope_48>(lowCut, cutCoefficients);
case Slope_36:
updateCutFilterElement<Slope_36>(lowCut, cutCoefficients);
case Slope_24:
updateCutFilterElement<Slope_24>(lowCut, cutCoefficients);
case Slope_12:
updateCutFilterElement<Slope_12>(lowCut, cutCoefficients);
}
}
C++
복사
Peak Filter와 마찬가지로 designIIRHighpassHighOrderButterworthMethod를 통해 Lowcut Filter를 update시켜주는 코드를 작성합니다.
void SimpleEQAudioProcessor::updateLowCutFilters(const ChainSettings &chainSettings)
{
auto lowCutCoefficients = juce::dsp::FilterDesign<float>::designIIRHighpassHighOrderButterworthMethod(chainSettings.lowCutFreq,
getSampleRate(),
(chainSettings.lowCutSlope + 1) * 2);
auto& leftLowCut = leftChain.get<ChainPositions::LowCut>();
updateCutFilter(leftLowCut, lowCutCoefficients, chainSettings.lowCutSlope);
auto& rightLowCut = rightChain.get<ChainPositions::LowCut>();
updateCutFilter(rightLowCut, lowCutCoefficients, chainSettings.lowCutSlope);
}
void SimpleEQAudioProcessor::updateHighCutFilters(const ChainSettings &chainSettings)
{
auto highCutCoefficients = juce::dsp::FilterDesign<float>::designIIRLowpassHighOrderButterworthMethod(chainSettings.highCutFreq,
getSampleRate(),
(chainSettings.highCutSlope + 1) * 2);
auto& leftHighCut = leftChain.get<ChainPositions::HighCut>();
updateCutFilter(leftHighCut, highCutCoefficients, chainSettings.highCutSlope);
auto& rightHighCut = rightChain.get<ChainPositions::HighCut>();
updateCutFilter(rightHighCut, highCutCoefficients, chainSettings.highCutSlope);
}
C++
복사
updateFilters()에도 추가해줍니다.
void SimpleEQAudioProcessor::updateFilters()
{
auto chainSettings = getChainSettings(apvts);
updateLowCutFilters(chainSettings);
updatePeakFilter(chainSettings);
updateHighCutFilters(chainSettings);
}
C++
복사
3.7. GarageBand에서 만든 플러그인 불러오기
Garageband를 켭니다.

프로젝트를 만들어줍니다.
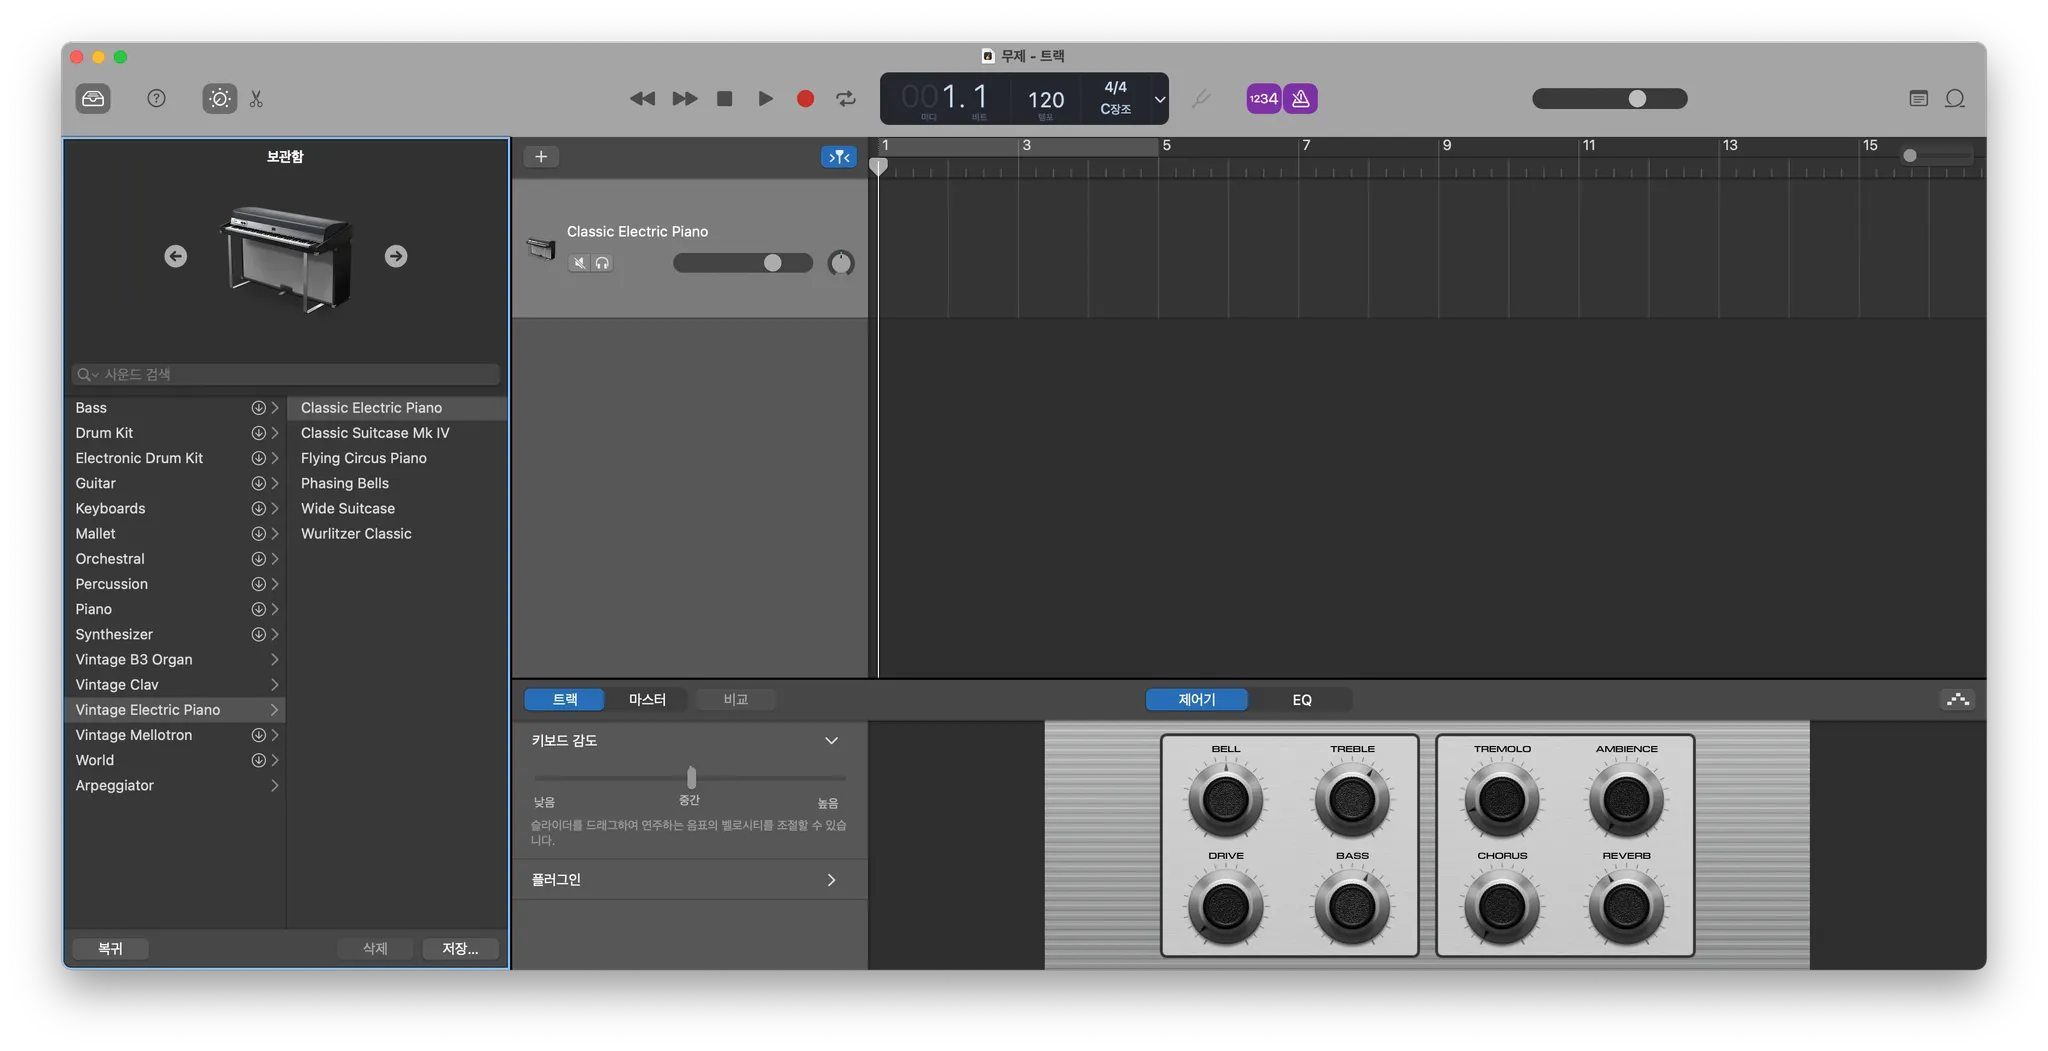
처리하고 싶은 곡을 Drag & Drop하여 오디오트랙 하나를 만듭니다.
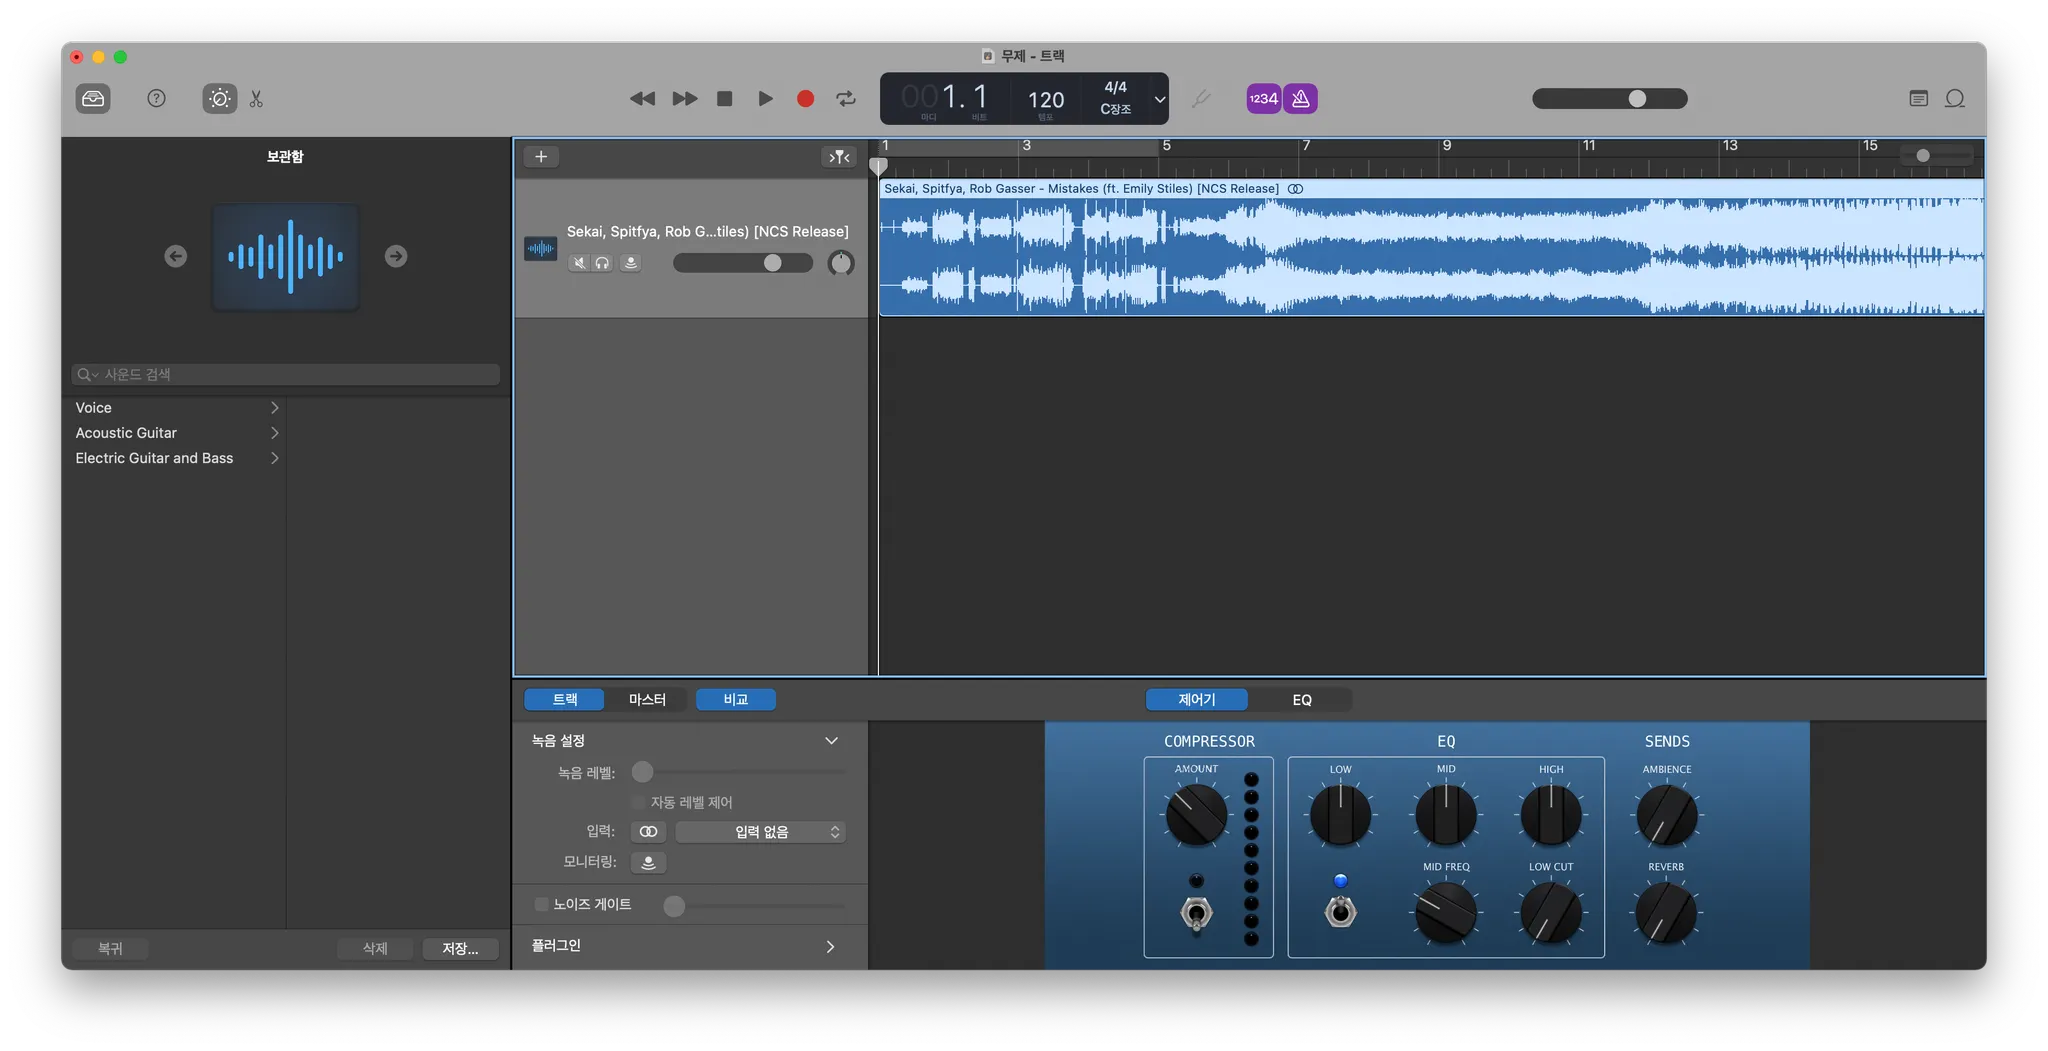
아래쪽에 플러그인 → Audio Units → yourcompany → SimpleEQ를 선택합니다.
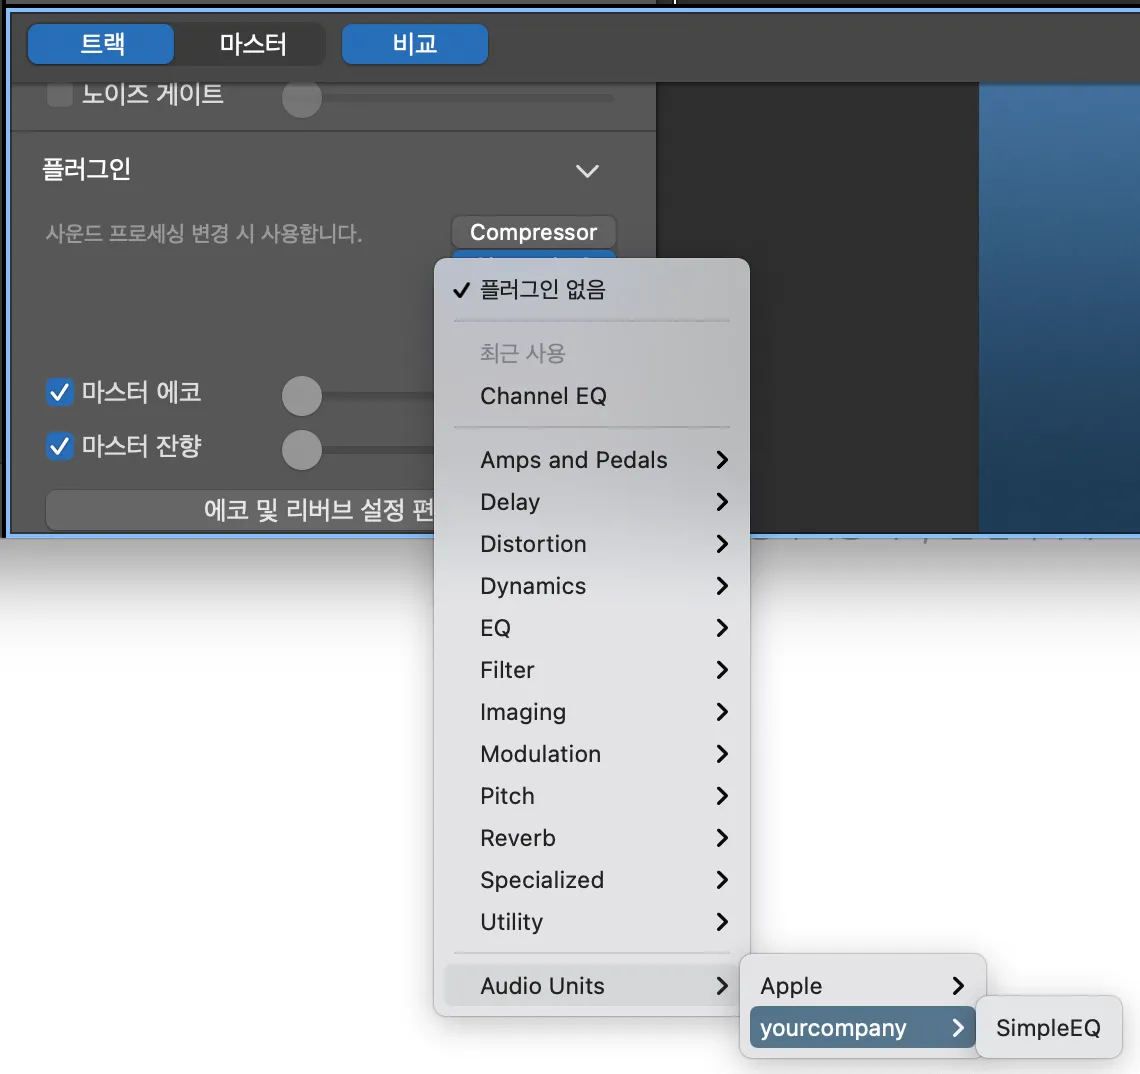
요 화면이 뜨면 성공적으로 불러와진 것입니다! 이것저것 만져보세요 :D